You are using an out of date browser. It may not display this or other websites correctly.
You should upgrade or use an alternative browser.
You should upgrade or use an alternative browser.
Military History & Tactics Thread
- Thread starter Friko_Prizm
- Start date
- Status
- Not open for further replies.
AceofSom
nx]\\0-9
Military history and tactics 
Regarding operation Barbarossa, it was one of Hitlers biggest mistakes. If you read military history, taking Russia is one of the tough challenges, where Napoleon and others failed.
One of the critical mistakes made by Hitler in the Eastern Front was not freeing the 6th German army which was surrounded by Soviet forces. Germany lost 225000 men. Hitler was stubborn, instead of attempting to break them out he told to keep the axis forces in Stalingrad and which eventually got destroyed by the soviets.
Military history and tactics
Regarding operation Barbarossa, it was one of Hitlers biggest mistakes. If you read military history, taking Russia is one of the tough challenges, where Napoleon and others failed.
One of the critical mistakes made by Hitler in the Eastern Front was not freeing the 6th German army which was surrounded by Soviet forces. Germany lost 225000 men. Hitler was stubborn, instead of attempting to break them out he told to keep the axis forces in Stalingrad and which eventually got destroyed by the soviets.
Couldn't agree more.
In hindsight, more than anything what really doomed the Germans was Hitler not allowing( Heinz Guderian ) to have a free hand and take a strong calculated risk when the strategy was working out quite well (and to assault moscow when the iron was hot instead of waiting for the rest of front to stabilize and then dismissing him altogother when the harsh winter came along to fight with the soviets.
What I really learned back then was just how much the Soviets retaliated with their own bombing campaigns against Axis cities.
THE ART OF WAR - PRINCIPLES OF MASTER SUN TZU -
Created by master Sun Tzu, these principles are not just still relevant in wars but they can teach you strategy, tactics and ways of dealing with your competitors in the corporate world.

----------------------------
There was no greater war leader and strategist than Chinese military general Sun Tzu. His philosophy on how to be a great leader and ensure you win in work, management, and life is summed up in these 31 pieces of advice.
They can all be applied by you in your in your everyday life & to build good habits.
Created by master Sun Tzu, these principles are not just still relevant in wars but they can teach you strategy, tactics and ways of dealing with your competitors in the corporate world.
----------------------------
There was no greater war leader and strategist than Chinese military general Sun Tzu. His philosophy on how to be a great leader and ensure you win in work, management, and life is summed up in these 31 pieces of advice.
They can all be applied by you in your in your everyday life & to build good habits.
- A leader leads by example, not by force.
- You have to believe in yourself.
- Appear weak when you are strong, and strong when you are weak.
- If your enemy is secure at all points, be prepared for him. If he is in superior strength, evade him. If your opponent is temperamental, seek to irritate him. Pretend to be weak, that he may grow arrogant. If he is taking his ease, give him no rest. If his forces are united, separate them. If sovereign and subject are in accord, put division between them. Attack him where he is unprepared, appear where you are not expected.
- The supreme art of war is to subdue the enemy without fighting.
- Supreme excellence consists of breaking the enemy’s resistance without fighting.
- If the mind is willing, the flesh could go on and on without many things.
- Victorious warriors win first and then go to war, while defeated warriors go to war first and then seek to win.
- To know your Enemy, you must become your Enemy.
- Keep your friends close, and your enemies closer.
- Can you imagine what I would do if I could do all I can?
- Even the finest sword plunged into salt water will eventually rust.
- Engage people with what they expect; it is what they are able to discern and confirms their projections. It settles them into predictable patterns of response, occupying their minds while you wait for the extraordinary moment — that which they cannot anticipate.
- If you know the enemy and know yourself, you need not fear the result of a hundred battles. If you know yourself but not the enemy, for every victory gained you will also suffer a defeat. If you know neither the enemy nor yourself, you will succumb in every battle.
- Thus we may know that there are five essentials for victory:
1 He will win who knows when to fight and when not to fight.
2 He will win who knows how to handle both superior and inferior forces.
3 He will win whose army is animated by the same spirit throughout all its ranks.
4 He will win who, prepared himself, waits to take the enemy unprepared.
5 He will win who has military capacity and is not interfered with by the sovereign.
- Be extremely subtle, even to the point of formlessness. Be extremely mysterious, even to the point of soundlessness. Thereby you can be the director of the opponent’s fate.
- Strategy without tactics is the slowest route to victory. Tactics without strategy is the noise before defeat.
- There are not more than five musical notes, yet the combinations of these five give rise to more melodies than can ever be heard.There are not more than five primary colors, yet in combination they produce more hues than can ever been seen.There are not more than five cardinal tastes, yet combinations of them yield more flavors than can ever be tasted.
- Opportunities multiply as they are seized.
- When the enemy is relaxed, make them toil. When full, starve them. When settled, make them move.
- Know yourself and you will win all battles.
- Move swift as the Wind and closely-formed as the Wood. Attack like the Fire and be still as the Mountain.
- Let your plans be dark and impenetrable as night, and when you move, fall like a thunderbolt.
- When strong, avoid them. If of high morale, depress them. Seem humble to fill them with conceit. If at ease, exhaust them. If united, separate them. Attack their weaknesses. Emerge to their surprise.
- All warfare is based on deception. Hence, when able to attack, we must seem unable; when using our forces, we must seem inactive; when we are near, we must make the enemy believe we are far away; when far away, we must make him believe we are near.
- There is no instance of a country having benefited from prolonged warfare.
- The greatest victory is that which requires no battle.
- Treat your men as you would your own beloved sons. And they will follow you into the deepest valley.
- Build your opponent a golden bridge to retreat across.
- All warfare is based on deception.
- When you surround an army, leave an outlet free. Do not press a desperate foe too hard.
AceofSom
nx]\\0-9
THE ART OF WAR - PRINCIPLES OF MASTER SUN TZU -
Created by master Sun Tzu, these principles are not just still relevant in wars but they can teach you strategy, tactics and ways of dealing with your competitors in the corporate world.
----------------------------
There was no greater war leader and strategist than Chinese military general Sun Tzu. His philosophy on how to be a great leader and ensure you win in work, management, and life is summed up in these 31 pieces of advice.
They can all be applied by you in your in your everyday life & to build good habits.
Source: Forbes
- A leader leads by example, not by force.
- You have to believe in yourself.
- Appear weak when you are strong, and strong when you are weak.
- If your enemy is secure at all points, be prepared for him. If he is in superior strength, evade him. If your opponent is temperamental, seek to irritate him. Pretend to be weak, that he may grow arrogant. If he is taking his ease, give him no rest. If his forces are united, separate them. If sovereign and subject are in accord, put division between them. Attack him where he is unprepared, appear where you are not expected.
- The supreme art of war is to subdue the enemy without fighting.
- Supreme excellence consists of breaking the enemy’s resistance without fighting.
- If the mind is willing, the flesh could go on and on without many things.
- Victorious warriors win first and then go to war, while defeated warriors go to war first and then seek to win.
- To know your Enemy, you must become your Enemy.
- Keep your friends close, and your enemies closer.
- Can you imagine what I would do if I could do all I can?
- Even the finest sword plunged into salt water will eventually rust.
- Engage people with what they expect; it is what they are able to discern and confirms their projections. It settles them into predictable patterns of response, occupying their minds while you wait for the extraordinary moment — that which they cannot anticipate.
- If you know the enemy and know yourself, you need not fear the result of a hundred battles. If you know yourself but not the enemy, for every victory gained you will also suffer a defeat. If you know neither the enemy nor yourself, you will succumb in every battle.
- Thus we may know that there are five essentials for victory:
1 He will win who knows when to fight and when not to fight.
2 He will win who knows how to handle both superior and inferior forces.
3 He will win whose army is animated by the same spirit throughout all its ranks.
4 He will win who, prepared himself, waits to take the enemy unprepared.
5 He will win who has military capacity and is not interfered with by the sovereign.
- Be extremely subtle, even to the point of formlessness. Be extremely mysterious, even to the point of soundlessness. Thereby you can be the director of the opponent’s fate.
- Strategy without tactics is the slowest route to victory. Tactics without strategy is the noise before defeat.
- There are not more than five musical notes, yet the combinations of these five give rise to more melodies than can ever be heard.There are not more than five primary colors, yet in combination they produce more hues than can ever been seen.There are not more than five cardinal tastes, yet combinations of them yield more flavors than can ever be tasted.
- Opportunities multiply as they are seized.
- When the enemy is relaxed, make them toil. When full, starve them. When settled, make them move.
- Know yourself and you will win all battles.
- Move swift as the Wind and closely-formed as the Wood. Attack like the Fire and be still as the Mountain.
- Let your plans be dark and impenetrable as night, and when you move, fall like a thunderbolt.
- When strong, avoid them. If of high morale, depress them. Seem humble to fill them with conceit. If at ease, exhaust them. If united, separate them. Attack their weaknesses. Emerge to their surprise.
- All warfare is based on deception. Hence, when able to attack, we must seem unable; when using our forces, we must seem inactive; when we are near, we must make the enemy believe we are far away; when far away, we must make him believe we are near.
- There is no instance of a country having benefited from prolonged warfare.
- The greatest victory is that which requires no battle.
- Treat your men as you would your own beloved sons. And they will follow you into the deepest valley.
- Build your opponent a golden bridge to retreat across.
- All warfare is based on deception.
- When you surround an army, leave an outlet free. Do not press a desperate foe too hard.
One of the greatest books ever written, it can be used for a lot of things. @Friko_Prizm anyone who is interested in military history and tactics has to read about the warring period in China. Theirs many other military genius besides Sun tzu like Jiang Ziya and Wu Qi.
Can you believe these guys were fielding million men armies back then

WHEN HITLER "REFUSED" TO DEFEAT BRITAIN -
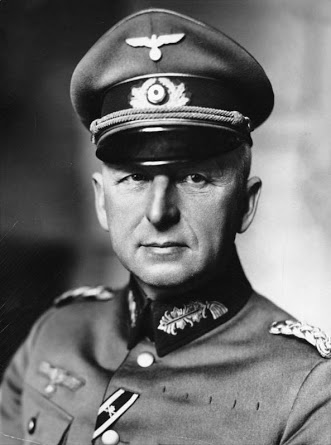
"A lost victory" - Field Marshall Erich Von Manstein
Background
After conquering Poland in the East, the German forces were poised for "Fall Gelb"-an offensive in the West. It started on the dawn of May 10 1940 when the German airborne troops landed in Belgium and Netherlands to secure key bridges.
The surprise attack on France would come from the wooded Ardennes in Belgium where the French least expected it. On May 12, the German forces were at the Franco-Belgian border and their un stoppable advance deep inside France started. Paul Von Kliest's forces broke through the French defenses into the open country, turning Westward in the direction of English channel.
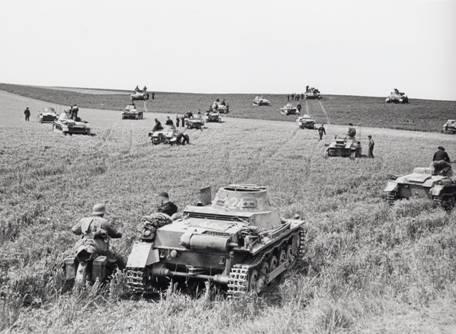
General Heinz Guderian's panzers on the advance - France 1940
"Dunkrik pocket"
General Heinz Guderian's panzers(tanks) had advanced way ahead than the slow infantry in pursuit of the allies. This made his superior Kliest and even Hitler worried that without infantry support, the panzers were vulnerable so despite Guderian's protests, he was ordered to halt on May 15 and again on May 17 which invited counter attacks from the allies but none came as the allies were too exhausted and low on morale. Despite these two delays, Guderian's panzers reached the town of Abbeville on the English channel thus splitting the allies in two, with the experienced 140,000 French and the pre war trained 198,000 troops of the British expedetionary force (BEF) trapped in what later came to be known as "Dunkrik pocket".
With their backs to the wall, the British mounted a brave and successful counter attack on Rommel's panzers at Arras on May 21 confusing him about the actual number of the British troops involved in the attack. Nevertheless, the attack failed to materialise as the French counter attack in another sector failed to supplement the temporary victory at Arras but the British attack did delay Rommel's lightening advance.
Finally, the German forces were poised to deliver a deadly blow to the British at Dunkirk by killing or capturing most of the remnants of BEF. Nothing less of a miracle could now save the BEF whose only hope of survival was to evacuate using the port of Dunkrik. The British had already started gathering every available ship, merchant vessel and fisher boat to help pull it's trapped troops out.
Hitler snatches defeat from the jaws of victory
Ready to pounce on their prey, German forces crossed the canal defence line at Dunkrik on May 24. Kliest had his prey cornered. He burned to advance and bag it when an inexplicable order from none other than Hitler himself not only halted the advance but called the German forces back to the line!
This order to halt the advance put an end to any realistic hope to defeat Britain. From May 26 to June 4, the British thus evacuated their men along with more than one hundred thousand French soldiers to England. Although the British managed to save their men but they had to leave most of their heavy equipment behind.
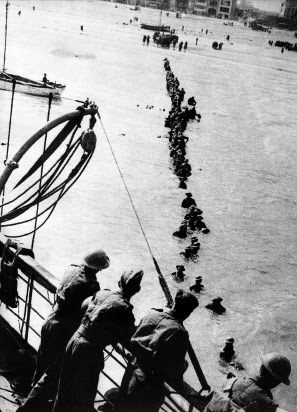
'Operation Dynamo' was the British code name of the evacuation of Dunkrik
Why Hitler halted the advance?
Although there are many theories about it but this is not explainable why Hitler allowed enemy soldiers to escape. Many say that he did so because before giving orders to halt the advance, Hitler was convinced by Herman Goering, the commander in chief of the Luftwaffe(Air force) that his aircraft could destroy the British at Dunkrik. His bombers hit the port of Dunkrik but the smoke rising from the destroyed port screened the evacuating British from any attack by the Luftwaffe thus making the job to provide air cover easier for the Royal Air Force (RAF).
Some also believe that Hitler also wanted to impose his peace terms on British by allowing their forces an escape so that it may not provoke them to resist at all costs.
SOMALI GENERAL
VIP
The Germans were doing fine because they consolidated their new territories fairly effectively until Hitler made that dumb mistake to invade Russia in Winter time.WW2 map. German and Japan were chilling in 1942
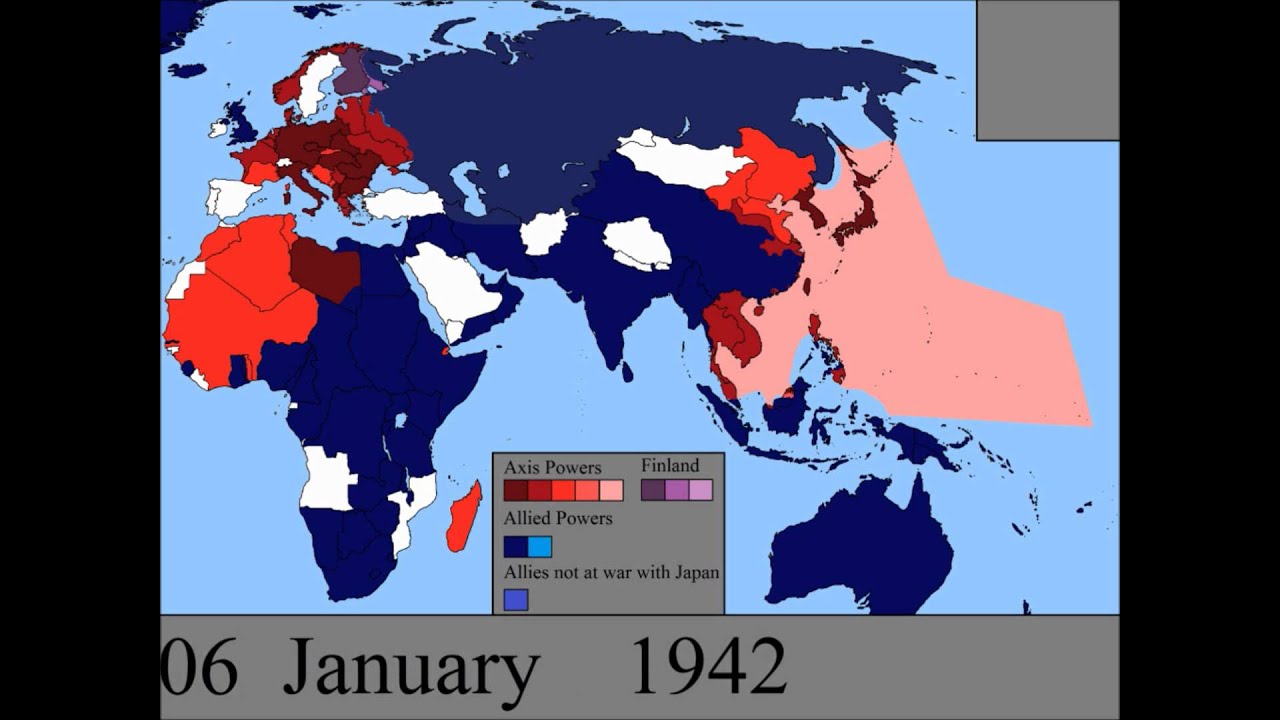
Whereas, the Japanese were spreading themselves too thin and they never fully exploited their newly acquired territories to fuel their war machine. The moment they bombed pearl harbour was when the war was lost for them because Japan could never compete with usa in terms of indusrial output, man-power and resources in a long-term war.
Last edited:
AceofSom
nx]\\0-9
The Germans were doing fine because they consolidated their new territories fairly effectively until Hitler made that dumb mistake to invade Russia in Winter time.
Whereas, the Japanese were spreading themselves too thin and they never fully exploited their newly acquired territories to fuel their war machine. The moment they bombed pearl harbour was when the war was lost for them because Japan could never compete with usa in terms of indusrial output, man-power and resources in a long-term war.
that was biggest mistake,invading Russia, he should have taken Britan first.
AceofSom
nx]\\0-9
All these old school military tactics are useless when fighting nuclear nations.
They are only still applicable to Africa and the Middle East.
You can't apply those tactics to Eurasia (Europe & Asia) anymore.
nuclear powered nations dont fight each other, MAD. Mutually assured destruction
Apollo
VIP
nuclear powered nations dont fight each other, MAD. Mutually assured destruction
Proxy wars.
And I suspect it will happen one day in the 21st century that either Russia or China (most likely China) will be in conflict with the USA.
AceofSom
nx]\\0-9
Proxy wars.
And I suspect it will happen one day in the 21st century that either Russia or China (most likely China) will be in conflict with the USA.
Maybe with China but unlikely with Russia. China presents the biggest challenge to US hegemony, from economic to security.
SOMALI GENERAL
VIP
All these old school military tactics are useless when fighting nuclear nations.
They are only still applicable to Africa and the Middle East.
You can't apply these tactics to Eurasia (Europe & Asia) anymore.
Nuclear armed nations could still fight by utilising conventional warfare tactics. I highly doubt nuclear bombs will be used and will only be a last resort option.nuclear powered nations dont fight each other, MAD. Mutually assured destruction
BATTLE TACTICS 1 : HAMMER & ANVIL -
Battle Tactics 1 - Hammer and Anvil

Introduction
Hammer and Anvil is a classical military tactics, it was used extensively by Alexander the Great during his conquest for half of the known world. Some historian even said it was Alexander the great who created this tactics, tho it's quite doubtful this is the case.
Hammer and Anvil is such a good tactics, even with weapon and engagement changed over time, we can still see its usage by modern military today, and one thing we cannot doubt is that it was hammer and anvil tactic that give birth to a lot of modern military tactics. either from trying to counter it or from modifying it usage over the time.
As such, this tactic deserve to talk about in this battle tactics corner. And it is our number one article.
Background History
Although no one can be certain when exactly is Hammer and Anvil tactics is created, some credited Alexander the Great, no one can be certain when did this tactics was first used in any military conflict. Chances are it was already used either by mean or by accident long before 350BC (bear in mind the earliest record for cavalry is at around 450 to 500 BC.)
However, one thing can be sure is that this tactics is made famous from Alexander the great during his conquer of half the known world.
When Alexander use it, he uses with his companion cavalry match up with heavy or light infantry to act as the Hammer and Anvil effect. It was used quite extensively as a part of his conquering campaign
In a historical sense, hammer and anvil were used numerous time and it's one of the old pillar of military tactics, even with time changed, with the advance weaponry, the hammer and anvil continue to be employed in theatre of war
How does it works?
In short, Hammer and Anvil worked by pinning your enemy, usually less mobile with your own infantry, then using a faster force to envelope your less mobile enemy from behind, thus pinning or hammering your enemy into the anvil (your own infantry) for the slaughter.
By passing or sandwiching your enemy between your lighter but faster force and your heavy and bulkier force, you can, as we say, chop them in the front and stab them in the back, and basically surrounding your enemy from all side, it will force them to fight inn two front, also, by enveloping your enemy, you also cut off their supply.
Easy enough to say, in reality, the success of an Hammer and Anvil tactics would require a number of factors.
1.) Geographic factors - Geographic factors works both ways, meaning it will work for or against both you and your enemy. Putting your enemy in a harsh terrain would ensure disengagement impossible for your slower enemy, however, same terrain will also work against your own fast troop. Theoretically, the best terrain for a Hammer and Anvil tactics is with river or ocean on one side of your enemy, and slope or flatland on the other
2.) Speed - The speed of your fast unit will need to be able to cover the gap between your enemy and their escape route, if your enemy can pull back and disengage before your fast unit converging on their retreat, then this will become a moot point.
However, moving too fast would present another problem, moving too fast would mean your enemy have time to prepare a two front war with your slower unit and your larger unit.
3.) Number and Strength - You need to have strength and number in both your hammer and anvil, your hammer can be of a smaller force, but your anvil must be able to absorb the blow from your enemy. Otherwise, when you hammer your enemy toward the anvil (your infantry), if there are too litter infantry to hold the line, what you basically do is simply hammer your enemy from behind and they broke your line and move forward.
In another words, your anvil must be strong enough, and good enough to take on the grind.
Tactical Consideration
For Hammer and Anvil tactics, there are two distinct considerations for this tactic
1.) Speed is the key, quick in, quick out, make sure your enemy cannot envelope your group, or in modern sense, bring artillery on top of you to bring down your attacks.
In extreme case, your enemy could actually be setting up a trap for you to engage a smaller force, scarified that smaller force and win a local engagement with you with tactical air support or artillery support. Or they will simply roll you over with a bigger force
2.) Anchoring the Hammer and Anvil, although a double Hammer and Anvil do exist (the one which you use cavalry on both side and roll up your enemy on both left and right flank), the anchor point of your tactics should be carefully chosen, the end goal is you want to roll up your enemy from behind, meaning you will need to anchor your infantry and your fast unit (in this case cavalry) to close a circle. otherwise you are routing your enemy, but not feeding them into your infantry grinder.
Counter Tactics
In some way, this tactics cannot be stopped once it started. But there are several thing you can do to push this tactics if you are in one.
1.) Using your fast troop to engage the hammer. Very old tactics, not quite useful today, but worked well in the old days, what you simply do is to crash your own cavalry (If you have them) into the hammer paths, and if you can destroy or disrupt the hammer blow, you will force your enemy back into a grinding war.
And because it usually mean your enemy have inferior number or strength (otherwise they would simply do a head on attack) Which mean you can usually crashed the anvil and break out.
2.) Using your own fast troop as a hammer. If terrain allowed (therefore this is such an important requirement for this tactics), you can simply replicate your enemy by launching your own hammer and anvil attacks, that way, we can see who break first and who break first, loses.
3.) More modern technique would call for a defensive approach with air/land/sea interdiction. It will be harder for modern warfare to pull off such a tactics, one thing is the advancement of secondary bombardment. Today, unlike ancient time, troop can be interdicted with ranged weaponry (such as Howitzer or Artillery) and the approach can be mined so the fast unit (such as tank) could be bogged down by defensive measure, as speed is the key, this will work against the tactic'
While most people believe a refused flank can help with defending the Hammer and Anvil tactics, this have proven in battle of Cannae as false, the hammer can simply stretch to a point it can still roll up your flank, and because the cavalry is mobile, they can simply go around your refused flank and attack you from the rear.
Case Studies
Battle of Gaugamela - October 1, 330 BC

The prime example for Alexander the Great with his companion cavalry using the Hammer and Anvil Tactic to destroy the Persian left flank.
Alexander, with his 47,000 troop, engaging a large Persian force led by King Darius III numbered from 60,000 to 90,000 troop and cavalry.
Holding the main Macedonian line is 30,000 heavy pike man of the Alexander Phalanx formation, with 9,000 supporting light infantry, and 7,000 companion cavalry, Alexander the Great laid out his battle line with a double refused flank formation looks like a Trapezium Shape. With both Cavalry unit on the side, arch back 45 degrees, and the main Phalanx on the center battle line, back up with light infantry and reserves.
Darius spread his force in a straight line, with both cavalry and chariot on the side, infantry in the center.
The battle open with Darius engaging both flank on Alexander's line in a cavalry battle, meanwhile the charging Persian engage the phalanx formation in the center. The last bit of the puzzle is for Darius to use his chariots onto Alexander command line, which in turn opening up a gap for Alexander to charge thru. While the chariot attack was either intercepted or rendered harmless by opening up the Macedonian rank and let the chariot harmlessly passed.

Seizing the gap with the confused Persian cavalry and chariot, Alexander charged thru the gap with his companion cavalry, using his reserve phalanx to hold down the Persian cavalry attacks..
After smashing into the Persian infantry line, Alexander return and engage the Persian line from behind, thus, hammering the Persian front line into Alexander's own Phalanx formation.
At this stage, both Persian center and left flanks collapsed, and king Darius escaped, only the Persian right and center right remain as a viable force, which threaten to roll over Alexander's own left flank, eventually Alexander own force reinforced their left flank and repelled the Persian attacks. But not before some Persian troop broke thru and looting Alexander's camp.
The overall battle is a success, with Alexander force being in a 2 on 1 long way (8/90,000 Persian v 47,000 Macedonian) and in particular, Persian cavalry outnumber Alexander's cavalry 2 or 3 to 1. The clever use of Hammer and Anvil save the day for Alexander
Battle of Cannae - August 2, 216 BC

Battle of Cannae is fought between Roman Empire and Carthage on Cannae, modern day southern Italy.
Carthaginian force numbered in 57,000 while Roman send out 8 Legions (instead of the usual 4) numbering between 50,000 o 60,000 (with high estimate to 80,000) troops. Mostly foot soldier, with roman fighting technique, these force would have been heavily armed and more importantly, heavily armored.
The Carthaginian position their troop in two reverse echelon, resembling a triangle. With the African infantry and Spanish cavalry in the center flanked by Spanish and Numidian cavalry on the flank.
The Roman have their usual legion march formation, packing their troop in a tight rectangular shape and march with discipline
With both side march into each other, Roman held their formation while the Carthage change his formation with and extended convex shape resembling a slight half oval or semicircle (depending on which source you read) but in all, the Carthage line draw back at the center, with the Spanish cavalry prepare to break rank. This shape also give the Carthage a longer line which best to absorb the initial roman smash because of the shape.

Battle started with both Carthage flank attack both Roman cavalry, routing the Roman cavalry early on in the battle, leave behind the Roman infantry, early in the battle, with the Roman infantry engaging the Carthage infantry in the middle, the Carthage pull back the center to stretch the line and absorb the shock from the Roman, as the line stretch longer and curvier, the Roman rooted deep into the Carthage rank, but at this point, Hannibal order the Libyan infantry, which is heavy pike man, to engage and roll up both flank of Roman rank, which is now deep inside the Carthage line. to round up the attack, the Spanish cavalry then roll to the back of the Roman Legions and completely surrounded the Romans.
Both African infantry and Spanish cavalry then hammer the Roman into the Carthage main line, which comprise of mostly Gaul and Iberian infantry, which is fierce hand to hand fighter.
As such, the Roman cannot chew thru the Iberian and Gaul line and at the same time being hammered in the back, and the attack fall apart. estimated 40,000 roman (or 6 Legions) decimated in this battle, and Carthage win the battle with an overall 2 to 1 odds.
Battle of Baghdad - April 3 - 12, 2003 AD
One of the battle I have actually fought myself, on the eve of the invasion of Iraq, the US military prepared a two front war headed by a mixed British and US Marine on the southern route, and US 3d Infantry division on the western route, this is the latest known example of Hammer and Anvil being use in modern warfare.

US Marine and the British force, numbering about 18,000 ill attack town after town thru Barsa, Qul'at, al-Kut and then onto Baghdad to the south, on the other hand, US 3d ID will attack along a Western route, smashing thru Nasiriya, Najaf, Karbala and then hook right into Baghdad from the West.
While the majority of Iraqi Republic guard will fight along the line of the US Marine and the British force, majority of them will ten be trapped between the US Marine to the south and the US 3d Infantry to the west, also with 173rd Airborne brigade airdropped to tikrit North of Baghdad, cutting off the Republic guard retreat.
In all, the US will have 30,000 soldier amongst the 1st Marine Division, 3rd infantry division, 173 independent airborne brigade and the British force. Facing off 50,000 Iraqi republic guard littered around both US forces objective.

US Marine tasked to take both Al-Kut and Nasiriya with minor casualty. while the US 3rd Infantry took Najaf and Karbala and move onto the Baghdad International in the West, from there, they used the BIA as the forward base and attack Baghdad from North West, where the Marine is approaching from the south, while the 3rd Infantry battle on the West and secure 3 ring road around the City of Baghdad, taking objective Moe, Larry and Curley from south west to north west, and taking Objective Diane.

The job of 64th Armored Regiment of the 3d ID is to force the Iraqi republic guard out of their position and move south by cutting from South West to North, and force them onto the Marine line, by which time, have established road block to the south of the city.
Rounding out the battle, the US loses at about 34 KIA with 5-600 WIA of their 30,000 troop, Iraqi suffered 2500+ KIA in the fight and unknown number of WIA, this has been contributed to the hammer and anvil effect started by the tanks of 3d ID.
Battle Tactics 1 - Hammer and Anvil
Introduction
Hammer and Anvil is a classical military tactics, it was used extensively by Alexander the Great during his conquest for half of the known world. Some historian even said it was Alexander the great who created this tactics, tho it's quite doubtful this is the case.
Hammer and Anvil is such a good tactics, even with weapon and engagement changed over time, we can still see its usage by modern military today, and one thing we cannot doubt is that it was hammer and anvil tactic that give birth to a lot of modern military tactics. either from trying to counter it or from modifying it usage over the time.
As such, this tactic deserve to talk about in this battle tactics corner. And it is our number one article.
Background History
Although no one can be certain when exactly is Hammer and Anvil tactics is created, some credited Alexander the Great, no one can be certain when did this tactics was first used in any military conflict. Chances are it was already used either by mean or by accident long before 350BC (bear in mind the earliest record for cavalry is at around 450 to 500 BC.)
However, one thing can be sure is that this tactics is made famous from Alexander the great during his conquer of half the known world.
When Alexander use it, he uses with his companion cavalry match up with heavy or light infantry to act as the Hammer and Anvil effect. It was used quite extensively as a part of his conquering campaign
In a historical sense, hammer and anvil were used numerous time and it's one of the old pillar of military tactics, even with time changed, with the advance weaponry, the hammer and anvil continue to be employed in theatre of war
How does it works?
In short, Hammer and Anvil worked by pinning your enemy, usually less mobile with your own infantry, then using a faster force to envelope your less mobile enemy from behind, thus pinning or hammering your enemy into the anvil (your own infantry) for the slaughter.
By passing or sandwiching your enemy between your lighter but faster force and your heavy and bulkier force, you can, as we say, chop them in the front and stab them in the back, and basically surrounding your enemy from all side, it will force them to fight inn two front, also, by enveloping your enemy, you also cut off their supply.
Easy enough to say, in reality, the success of an Hammer and Anvil tactics would require a number of factors.
1.) Geographic factors - Geographic factors works both ways, meaning it will work for or against both you and your enemy. Putting your enemy in a harsh terrain would ensure disengagement impossible for your slower enemy, however, same terrain will also work against your own fast troop. Theoretically, the best terrain for a Hammer and Anvil tactics is with river or ocean on one side of your enemy, and slope or flatland on the other
2.) Speed - The speed of your fast unit will need to be able to cover the gap between your enemy and their escape route, if your enemy can pull back and disengage before your fast unit converging on their retreat, then this will become a moot point.
However, moving too fast would present another problem, moving too fast would mean your enemy have time to prepare a two front war with your slower unit and your larger unit.
3.) Number and Strength - You need to have strength and number in both your hammer and anvil, your hammer can be of a smaller force, but your anvil must be able to absorb the blow from your enemy. Otherwise, when you hammer your enemy toward the anvil (your infantry), if there are too litter infantry to hold the line, what you basically do is simply hammer your enemy from behind and they broke your line and move forward.
In another words, your anvil must be strong enough, and good enough to take on the grind.
Tactical Consideration
For Hammer and Anvil tactics, there are two distinct considerations for this tactic
1.) Speed is the key, quick in, quick out, make sure your enemy cannot envelope your group, or in modern sense, bring artillery on top of you to bring down your attacks.
In extreme case, your enemy could actually be setting up a trap for you to engage a smaller force, scarified that smaller force and win a local engagement with you with tactical air support or artillery support. Or they will simply roll you over with a bigger force
2.) Anchoring the Hammer and Anvil, although a double Hammer and Anvil do exist (the one which you use cavalry on both side and roll up your enemy on both left and right flank), the anchor point of your tactics should be carefully chosen, the end goal is you want to roll up your enemy from behind, meaning you will need to anchor your infantry and your fast unit (in this case cavalry) to close a circle. otherwise you are routing your enemy, but not feeding them into your infantry grinder.
Counter Tactics
In some way, this tactics cannot be stopped once it started. But there are several thing you can do to push this tactics if you are in one.
1.) Using your fast troop to engage the hammer. Very old tactics, not quite useful today, but worked well in the old days, what you simply do is to crash your own cavalry (If you have them) into the hammer paths, and if you can destroy or disrupt the hammer blow, you will force your enemy back into a grinding war.
And because it usually mean your enemy have inferior number or strength (otherwise they would simply do a head on attack) Which mean you can usually crashed the anvil and break out.
2.) Using your own fast troop as a hammer. If terrain allowed (therefore this is such an important requirement for this tactics), you can simply replicate your enemy by launching your own hammer and anvil attacks, that way, we can see who break first and who break first, loses.
3.) More modern technique would call for a defensive approach with air/land/sea interdiction. It will be harder for modern warfare to pull off such a tactics, one thing is the advancement of secondary bombardment. Today, unlike ancient time, troop can be interdicted with ranged weaponry (such as Howitzer or Artillery) and the approach can be mined so the fast unit (such as tank) could be bogged down by defensive measure, as speed is the key, this will work against the tactic'
While most people believe a refused flank can help with defending the Hammer and Anvil tactics, this have proven in battle of Cannae as false, the hammer can simply stretch to a point it can still roll up your flank, and because the cavalry is mobile, they can simply go around your refused flank and attack you from the rear.
Case Studies
Battle of Gaugamela - October 1, 330 BC
The prime example for Alexander the Great with his companion cavalry using the Hammer and Anvil Tactic to destroy the Persian left flank.
Alexander, with his 47,000 troop, engaging a large Persian force led by King Darius III numbered from 60,000 to 90,000 troop and cavalry.
Holding the main Macedonian line is 30,000 heavy pike man of the Alexander Phalanx formation, with 9,000 supporting light infantry, and 7,000 companion cavalry, Alexander the Great laid out his battle line with a double refused flank formation looks like a Trapezium Shape. With both Cavalry unit on the side, arch back 45 degrees, and the main Phalanx on the center battle line, back up with light infantry and reserves.
Darius spread his force in a straight line, with both cavalry and chariot on the side, infantry in the center.
The battle open with Darius engaging both flank on Alexander's line in a cavalry battle, meanwhile the charging Persian engage the phalanx formation in the center. The last bit of the puzzle is for Darius to use his chariots onto Alexander command line, which in turn opening up a gap for Alexander to charge thru. While the chariot attack was either intercepted or rendered harmless by opening up the Macedonian rank and let the chariot harmlessly passed.
Seizing the gap with the confused Persian cavalry and chariot, Alexander charged thru the gap with his companion cavalry, using his reserve phalanx to hold down the Persian cavalry attacks..
After smashing into the Persian infantry line, Alexander return and engage the Persian line from behind, thus, hammering the Persian front line into Alexander's own Phalanx formation.
At this stage, both Persian center and left flanks collapsed, and king Darius escaped, only the Persian right and center right remain as a viable force, which threaten to roll over Alexander's own left flank, eventually Alexander own force reinforced their left flank and repelled the Persian attacks. But not before some Persian troop broke thru and looting Alexander's camp.
The overall battle is a success, with Alexander force being in a 2 on 1 long way (8/90,000 Persian v 47,000 Macedonian) and in particular, Persian cavalry outnumber Alexander's cavalry 2 or 3 to 1. The clever use of Hammer and Anvil save the day for Alexander
Battle of Cannae - August 2, 216 BC
Battle of Cannae is fought between Roman Empire and Carthage on Cannae, modern day southern Italy.
Carthaginian force numbered in 57,000 while Roman send out 8 Legions (instead of the usual 4) numbering between 50,000 o 60,000 (with high estimate to 80,000) troops. Mostly foot soldier, with roman fighting technique, these force would have been heavily armed and more importantly, heavily armored.
The Carthaginian position their troop in two reverse echelon, resembling a triangle. With the African infantry and Spanish cavalry in the center flanked by Spanish and Numidian cavalry on the flank.
The Roman have their usual legion march formation, packing their troop in a tight rectangular shape and march with discipline
With both side march into each other, Roman held their formation while the Carthage change his formation with and extended convex shape resembling a slight half oval or semicircle (depending on which source you read) but in all, the Carthage line draw back at the center, with the Spanish cavalry prepare to break rank. This shape also give the Carthage a longer line which best to absorb the initial roman smash because of the shape.
Battle started with both Carthage flank attack both Roman cavalry, routing the Roman cavalry early on in the battle, leave behind the Roman infantry, early in the battle, with the Roman infantry engaging the Carthage infantry in the middle, the Carthage pull back the center to stretch the line and absorb the shock from the Roman, as the line stretch longer and curvier, the Roman rooted deep into the Carthage rank, but at this point, Hannibal order the Libyan infantry, which is heavy pike man, to engage and roll up both flank of Roman rank, which is now deep inside the Carthage line. to round up the attack, the Spanish cavalry then roll to the back of the Roman Legions and completely surrounded the Romans.
Both African infantry and Spanish cavalry then hammer the Roman into the Carthage main line, which comprise of mostly Gaul and Iberian infantry, which is fierce hand to hand fighter.
As such, the Roman cannot chew thru the Iberian and Gaul line and at the same time being hammered in the back, and the attack fall apart. estimated 40,000 roman (or 6 Legions) decimated in this battle, and Carthage win the battle with an overall 2 to 1 odds.
Battle of Baghdad - April 3 - 12, 2003 AD
One of the battle I have actually fought myself, on the eve of the invasion of Iraq, the US military prepared a two front war headed by a mixed British and US Marine on the southern route, and US 3d Infantry division on the western route, this is the latest known example of Hammer and Anvil being use in modern warfare.
US Marine and the British force, numbering about 18,000 ill attack town after town thru Barsa, Qul'at, al-Kut and then onto Baghdad to the south, on the other hand, US 3d ID will attack along a Western route, smashing thru Nasiriya, Najaf, Karbala and then hook right into Baghdad from the West.
While the majority of Iraqi Republic guard will fight along the line of the US Marine and the British force, majority of them will ten be trapped between the US Marine to the south and the US 3d Infantry to the west, also with 173rd Airborne brigade airdropped to tikrit North of Baghdad, cutting off the Republic guard retreat.
In all, the US will have 30,000 soldier amongst the 1st Marine Division, 3rd infantry division, 173 independent airborne brigade and the British force. Facing off 50,000 Iraqi republic guard littered around both US forces objective.
US Marine tasked to take both Al-Kut and Nasiriya with minor casualty. while the US 3rd Infantry took Najaf and Karbala and move onto the Baghdad International in the West, from there, they used the BIA as the forward base and attack Baghdad from North West, where the Marine is approaching from the south, while the 3rd Infantry battle on the West and secure 3 ring road around the City of Baghdad, taking objective Moe, Larry and Curley from south west to north west, and taking Objective Diane.
The job of 64th Armored Regiment of the 3d ID is to force the Iraqi republic guard out of their position and move south by cutting from South West to North, and force them onto the Marine line, by which time, have established road block to the south of the city.
Rounding out the battle, the US loses at about 34 KIA with 5-600 WIA of their 30,000 troop, Iraqi suffered 2500+ KIA in the fight and unknown number of WIA, this has been contributed to the hammer and anvil effect started by the tanks of 3d ID.
BATTLE TACTICS 2 : AMBUSH -

Introduction
One of the oldest trick on any Military Handbook, ambush as a tactics have been around for thousand of years, dating back to ancient warfare. Ambushes gives commander a way to attack his/her enemy with both concealment and element of surprise. It is a great tactic especially when you are outnumbered.
This tactic have been in used for thousands of years and amazingly, have not change much since the concept inception during ancient warfare, however, as today warfare tend to break down big unit into smaller unit for Small Unit Action, today the use of ambushes are almost exclusively toward small unit between a fire team and a platoon, large scale ambushes are rare, but they do exist.
History
Ambush is a 3000 + years old tactics, it was seen many time in ancient warfare, from Battle of Trebia during the Second Punic War, up to the modern day war of terror, Ambush have been an integral part of Vietnam Communist and North Vietnamese People Army war with the United States.
Ambush is a tactic that can be used in both strategic level or tactical level, it is a common strategy that basically every sort of command share, and it have been used by any discipline and any type of war.
Perhaps the one thing that stands out about ambush is that it require no fix amount of resources to pull one out, and the execution is quite easy, that contribute to the tactic stand against the test of time.
There are several playbook developed by military leader over time on Ambush, most of them written to fit their own military doctrine.
What is an Ambush?
Ambush is a tactic that a force is using a concealed position and engage and defeat an enemy that both surprise and firepower. The side that initiate an ambush is going to set the time and place for it, and either entice the enemy into the ambush or observe the enemy routine and set the ambush accordingly.
There are a few different type of Ambush, strategic and tactical ambushes, in a strategic ambush, the side that initiate the ambush would have to figure out the enemy attacks route and their strategic and/or operational goal, and set up a strategic ambush accordingly.
Tactical ambush is a way for a unit to attack and ambush another unit, either it have no strategic value (eg ambush your enemy in a nightly/regular patrol) or do have strategic and operational value (eg, ambush your enemy in a rear guard action)
In Tactical Ambush, it can also break into 2 categories, Close and Far. Close (Quarter) Ambush and a Far Ambush, Close Ambush is defined as Small Arms range ambush, usually within 50-100 meters, where as Far Ambush usually involve support range, ir about from 100 to 400 meters
Tactical Ambush
When a forward unit (can be from a platoon size to fire team size) laid an ambush, it is then said to be an tactical ambush.
As previously mentioned, Tactical Ambush could and does some time have strategically implication, a unit set an ambush can either be simply on a routine patrol, or serve a certain purpose for other unit.
In a tactical ambush, the ambusher will separated into 3 different sections, the ambush team, the command team and the security team. A tactical ambush can then be laid in different terrain and different setting. depending on the end result.
There are virtually unlimited variation of tactical ambush, but the most common uses of Tactical Ambush is as followed
1.) L - Shape Ambush
2.) Linear Ambush
3.) C or U Shape ambush
4.) 360 degree ambush.
5.) Z Shape Ambush

L Shape ambush would probably the most common of all ambush, where an ambush force laid on the terrain forming an "L" shape, the L would be anchoring by the short edge, which basically in enfilade to the kill zone. The Kill Zone will then be cut off from behind, or "blocked" Then retreat is impossible.

Linear Ambush would be the second most common on tactical level, where a troop form a rough line parallel to the kill zone, and when the enemy enter the kill zone, The maximum fire angle would be done to the single file. This is popular not because it was the best ambush tactics (Which would be L) but rather for its simplicity and easy to carry out, also easy to disappear after ambushed your enemy.
C or U shape ambush would be the next one on the list, basically it form a cauldron which engulfed the whole enemy into your Kill Zone, usually start with an "L Shape" Ambush, by adding an extra arm (an extra flank) to it and make it a U or C Shape, depending on how the ambush anchoring
360 Degree Ambush is probably one of the hardest to pull out, it basically have your enemy surrounded by all size, and since you are surrounding your enemy with it, you run a risk of actually firing into your own troop by pulling a 360 degree ambush, usually used with BUNT or BUMM Line (Build Up Natural Terrain and Build Up Man Made).
Z Shape ambush is the holy grail of ambush, and once you can successfully pull out a Z Shape Ambush, most likely than not, you will be decimating your enemy. Z shape ambush hence is by far the HARDEST to pull out, but the most effective. Z shape ambush in reality is 2 L Shape Ambush or 2 V Shape ambush joined together by the end, and hence when the enemy eventually broke thru a L or a V, there would be another one to greet the enemy immediately, to pull out a Z shape ambush, you would require 2 overlapping Kill Zone.
Kill Zone
Not that PS4 game, a Kill Zone is a zone where you use your overlapping fire power to trap and destroy your enemy, a perfect kill zone would have a Machine gun on both end, lay on a enfilade to the direction of your enemy movement.
A Kill Zone is essential for an Ambush to be effective, a Kill Zone can be a natural path, or a engineered path.
You can multiply the killing effect on a kill zone by using supportive equipment. A Machine Gun can pin down enemy troop within a kill zone, a supporting mortar fire would make destroying your enemy a bit easier.
A Kill Zone can be open end or closed end, which means a kill zone can be extended or fixed by the number of troop, a zone can also be of polygon shape, depending on the terrain.
Security
When a unit go on to ambush another unit, such unit usually accompanied by a security detachment which laden on the side of the ambushing unit, in order to protect its flank.
Had the ambush been revealed or detected, the enemy will try to outflank the ambushing force, which where these security comes in handy.
The Security also can provide movement report or act as an LP/OP if they are well hidden, report back enemy traffic and activities, and the command element can then readjust the ambush
Command Element
As with all other military action, Ambush comes with a command element, a commander and its subordinate would be in the Command Element and organise the ambush, they would be best to have an unobstructed view on the enemy progress and also an unobstructed view on your own troop.
Command Element decide when and where to attack, or how to conceal your own element. Command element also responsible for the overall layout of the ambush, intelligence gathering and egress route when everything go south.
Strategic Ambush.
When a large unit (Such as Company, Battalion, Brigade or even Division) used to ambush your enemy as a whole, that ambush plan is said to be a Strategic Ambush
The key for Strategic Ambush is concealment and speed. Both of which is needed to move a large force into an area unnoticed. A good intelligence and counter intelligence network, a good command and control structure also help carry out Strategic Ambushes
A large scale ambush would usually involve a diversion or deception to begin the opening gambit. The uses of smaller force to try and entice the entire unit to step into a larger unit. Or simply allowing a prepared unit to engage and destroy an advancing unit (such cases like what the German did to the Roman in the Battle of Teutoberg Forest ) Where it allow a prepared force to disrupt and ultimately destroy an incoming enemy formation.
Each strategic ambush have its own strategic value, usually goes with a current operational demand. A Strategic Ambush can be used to start or end a change of objective.
Reacting to an Ambush
There are only one way to break an ambush, and that is to punch thru it before it is too late, however, if chances allow a withdraw, it could also be a consideration.
For Close Ambushes, as the kill zone is too close to you, you will take more damage trying to retreat then trying to punch thru it. So, for a standing close quarter ambush, the forces that inside the kill zone will try to assault the ambush force on the anchor point and get behind them and roll the ambush over.
For a Far ambush, units in kill zone can try to withdraw from the area if the range allow you to call for air/ground support. Another way is to assault the flank of the Ambushing force and either blow thru or disengage from the ambush.
The key to break out from an ambush is to try and maintain unit cohesion and integrity, where the goal of an ambush is to destabilise your own formation and the ambushing force can engage and destroy you one by one as you ceased to be a cohesive unit, and is not in mutual support position to each other. They Key to counter an Ambush is to fight your way out concentrating your firepower at one single point
The 5 steps for reacting to Ambush is as follow
-Go Prone
-Face the incoming fire
-Communicate
-Coordinate
-Assault
Avoiding Ambushes
Sometimes, when you have to react to it, it would have already been too late, so it would be wise to prevent and avoid being ambush in the first place. There are a few factors a commander can notice with the incoming ambush.
-Intelligence
To predict an ambush, intelligence are quite important. Troop movement, civilian movement, previous engagement are all good indicator on how or where your enemy is going to ambush you. The more you know the more completed picture you will hold. And chances are you will see an ambush coming your way from far away.
-Mapping
There are only a few spot anywhere that is suitable for an ambush, to ambush you, they will need to find a clearing to set up a kill zone, a concealment to conceal their troop, a vantage point to know you are coming and also an exfil route to get out after they ambush you. If you look at a map and you think that is a good place to ambush someone, chances are they are already there to ambush you.
-Sign
Not a sign saying "Ambush here". If there are no traffic on a busy day, that is a sign of something not right, a good commander always know what's different than the atmospheric in the area, Something is not right then chances are something is going to come down. If things seems out of place, usually because it WAS out of place, and that is the sign you need to look out
-Things going your way.
Usually, an enemy will stop you from getting into your way, and if you know there are enemy present in the area and they are not actively trying to stop you, that also means something is wrong. In the army, we have an old saying, there are no such things as going your way in war, when stuff is going all your way in war, you are being ambushed.
Case Study
Battle of River Trebia - 218 BC

In the battle of River Trebia, the Cartage ambushed the Roman near the water plain close to the River Trebia.
The ambush, laid by Hannibal's brother Mago was considered one of the military classics. Mago led 1000 cavalry and 1000 infantry into the river and conceal their encampment under the cover of darkness.
What happened was, when Hannibal open up their flank and pushing in a gap between their first and second line, Roman general Longus think that is a tactical error by the part of Hannibal, and move in between the first and second line to try and roll up the first infantry line from behind.
However, this is actually a trap for Hannibal to trap and destroy the Roman army from all side, once the Roman infantry enter the gap, the Mago Ambush closes the door and attack and surround the Roman from all sides.
What followed is a massacre.
Battle of Long Tan - 1966 AD

Battle of Long Tan is an engagement in Vietnam War, during which, a company (D Coy) of 6 Royal Australian Regiment (6RAR) was ambush in the plantation in Long Tan, Phouc Tuy province.
D Coy, 6RAR, commanded by major Harry Smith, start the day with a company size combat patrol into the woods West of Long Tan Plantation, after SIGINT element detected Heavy Enemy movement in the area. D Coy, 6RAR move alone the ridges called "Nui Dat 2" where the Vietcong D445 Battalion located.
Upon drawing in the 11 Platoon, lead by Lieutenant Gordon Sharp, the lead element open fire on 11 Platoon. Cutting down a whole section of Australian Troop. Thinking it was a platoon size enemy force, little do the Australian know, they were the forward element of a whole Battalion, 1100 men.
At this point, Smith move 10 Platoon, were moved to support 11 Platoon from their left flank, hoping to be able to pull 11 platoon back into Company Defensive position. That is not successful however, as D445 element started to encircle the newly moved up platoon, fearing the same fate as 11 Platoon (Which was being pinned down) Smith halted 10 platoon and move them into a Defensive Position
Artillery was called to Support the front of 11 Platoon position as well as East of 10th Platoon, at this point, a regimental fire support was called. 18 guns pound the area at a rate of 6 rounds per minute. It help stabilising both 11 and 10 platoon. However, with 11 platoon depleting their ammunition, A break out from 11 platoon is put into primary mission.
Smith then send 12 platoon, which was kept as company reserve to move up and relief 11 platoon. 12 platoon reach up to 200-250 meter away form 11 platoon, unable to move forward. now 12, 11 and 10 platoon form a triangle facing all direction.
The ties changes when 11 Platoon, now reduced to a single section of men (from 30 to 12 men) ran out of ammunition, 11 Platoon request artillery to fire at their position, so they can retreat toward 12 platoon. Artillery drop 25 and give the men of 11 platoon a danger close (a fact that gunnery officer Lt Morrie Stanley disputed as Sgt Buick observed artillery came "very close" to their position
At this point, RAAF resupply D Coy, and couple with the fact that 11 platoon radioman was shot and kill, Sgt Buick, now in charge of the platoon, decided to withdraw. And they ran 150 meter into 12 platoon position, upon reaching 12 platoon. 11 platoon have only 13 men out, 5 wounded 8 able bodied
D company, now with only 10 and 12 platoon as a effective fighting force, form up in a crescent shape anchoring with the HQ platoon and face the enemy onslaught, at the same time B Coy, 6RAR and A Coy 6RAR both ordered to support D Coy position in Long Tan, With B Coy moving in from the west on foot, A Coy boarded APC and travel all the way around and enter and broke the encirclement from the south.
The supporting element reached D Coy at 1910, at this point B Coy's 25 men reached D Coy as D Coy shrink their perimeter in preparation for the final NVA/VC assault. After the reinforcement broke through D445 battalion decided to disengage and melted back into the jungle.
Uzbin Valley Ambush - 2008 AD
Uzbin Valley ambush involve element of 3 Taliban Units and French ISAF force with support from USAFSOF and ANA.
The Taliban consist of 3 unit, around 100 soldier each, ambush and motorize French Company on the mountain passes on Uzbin Valley, toward the summit at Sper Kunday. The advance unit of the French Force, call sign Carmin-2 was ambushed by the local element of about 50 insurgent fighters at 15:30 zulu

While at the village of Sper Kunday, the Taliban have surrounded the forward element of Carmin-2 whom made it there, The vehicle section of Carmin-2 started firing their Heavy Weapon to support the Ground troop of Carmin-2 which dismounted and entered the village.
After Action report suggested that the French troop requesting Air Support at 16:10, Approximately 40 minutes since the Ambush started, and the USAF send ahead 2 F-15 Strike Eagle to support the French Troop, now being trapped in the summit of the Uzbin Valley pass.
Close proximity prevent Air Support from carry out Close Air Support. Taliban force also setup a blocking force to prevent the ground element of the remaining French/US troop to support the ambushed Carmin-2 Element up in the mountain.

Reinforcement finally arrived to secure Sper Kunday by air at 18:15 roughly 3 hours into the ambush, by now, the ground element stuck at Sper Kunday are seriously out of Ammunition. The reinforcement then together with Carmin-2 pushes the remaining Taliban out of their position at Sper Kunday.

At 00;10, 9 hours from the beginning of the ambush, the area is secured by Carmin-2, Carmin-3 and Rouge 3, both of which were sent as an reinforcement.
Introduction
One of the oldest trick on any Military Handbook, ambush as a tactics have been around for thousand of years, dating back to ancient warfare. Ambushes gives commander a way to attack his/her enemy with both concealment and element of surprise. It is a great tactic especially when you are outnumbered.
This tactic have been in used for thousands of years and amazingly, have not change much since the concept inception during ancient warfare, however, as today warfare tend to break down big unit into smaller unit for Small Unit Action, today the use of ambushes are almost exclusively toward small unit between a fire team and a platoon, large scale ambushes are rare, but they do exist.
History
Ambush is a 3000 + years old tactics, it was seen many time in ancient warfare, from Battle of Trebia during the Second Punic War, up to the modern day war of terror, Ambush have been an integral part of Vietnam Communist and North Vietnamese People Army war with the United States.
Ambush is a tactic that can be used in both strategic level or tactical level, it is a common strategy that basically every sort of command share, and it have been used by any discipline and any type of war.
Perhaps the one thing that stands out about ambush is that it require no fix amount of resources to pull one out, and the execution is quite easy, that contribute to the tactic stand against the test of time.
There are several playbook developed by military leader over time on Ambush, most of them written to fit their own military doctrine.
What is an Ambush?
Ambush is a tactic that a force is using a concealed position and engage and defeat an enemy that both surprise and firepower. The side that initiate an ambush is going to set the time and place for it, and either entice the enemy into the ambush or observe the enemy routine and set the ambush accordingly.
There are a few different type of Ambush, strategic and tactical ambushes, in a strategic ambush, the side that initiate the ambush would have to figure out the enemy attacks route and their strategic and/or operational goal, and set up a strategic ambush accordingly.
Tactical ambush is a way for a unit to attack and ambush another unit, either it have no strategic value (eg ambush your enemy in a nightly/regular patrol) or do have strategic and operational value (eg, ambush your enemy in a rear guard action)
In Tactical Ambush, it can also break into 2 categories, Close and Far. Close (Quarter) Ambush and a Far Ambush, Close Ambush is defined as Small Arms range ambush, usually within 50-100 meters, where as Far Ambush usually involve support range, ir about from 100 to 400 meters
Tactical Ambush
When a forward unit (can be from a platoon size to fire team size) laid an ambush, it is then said to be an tactical ambush.
As previously mentioned, Tactical Ambush could and does some time have strategically implication, a unit set an ambush can either be simply on a routine patrol, or serve a certain purpose for other unit.
In a tactical ambush, the ambusher will separated into 3 different sections, the ambush team, the command team and the security team. A tactical ambush can then be laid in different terrain and different setting. depending on the end result.
There are virtually unlimited variation of tactical ambush, but the most common uses of Tactical Ambush is as followed
1.) L - Shape Ambush
2.) Linear Ambush
3.) C or U Shape ambush
4.) 360 degree ambush.
5.) Z Shape Ambush
L Shape ambush would probably the most common of all ambush, where an ambush force laid on the terrain forming an "L" shape, the L would be anchoring by the short edge, which basically in enfilade to the kill zone. The Kill Zone will then be cut off from behind, or "blocked" Then retreat is impossible.
Linear Ambush would be the second most common on tactical level, where a troop form a rough line parallel to the kill zone, and when the enemy enter the kill zone, The maximum fire angle would be done to the single file. This is popular not because it was the best ambush tactics (Which would be L) but rather for its simplicity and easy to carry out, also easy to disappear after ambushed your enemy.
C or U shape ambush would be the next one on the list, basically it form a cauldron which engulfed the whole enemy into your Kill Zone, usually start with an "L Shape" Ambush, by adding an extra arm (an extra flank) to it and make it a U or C Shape, depending on how the ambush anchoring
360 Degree Ambush is probably one of the hardest to pull out, it basically have your enemy surrounded by all size, and since you are surrounding your enemy with it, you run a risk of actually firing into your own troop by pulling a 360 degree ambush, usually used with BUNT or BUMM Line (Build Up Natural Terrain and Build Up Man Made).
Z Shape ambush is the holy grail of ambush, and once you can successfully pull out a Z Shape Ambush, most likely than not, you will be decimating your enemy. Z shape ambush hence is by far the HARDEST to pull out, but the most effective. Z shape ambush in reality is 2 L Shape Ambush or 2 V Shape ambush joined together by the end, and hence when the enemy eventually broke thru a L or a V, there would be another one to greet the enemy immediately, to pull out a Z shape ambush, you would require 2 overlapping Kill Zone.
Kill Zone
Not that PS4 game, a Kill Zone is a zone where you use your overlapping fire power to trap and destroy your enemy, a perfect kill zone would have a Machine gun on both end, lay on a enfilade to the direction of your enemy movement.
A Kill Zone is essential for an Ambush to be effective, a Kill Zone can be a natural path, or a engineered path.
You can multiply the killing effect on a kill zone by using supportive equipment. A Machine Gun can pin down enemy troop within a kill zone, a supporting mortar fire would make destroying your enemy a bit easier.
A Kill Zone can be open end or closed end, which means a kill zone can be extended or fixed by the number of troop, a zone can also be of polygon shape, depending on the terrain.
Security
When a unit go on to ambush another unit, such unit usually accompanied by a security detachment which laden on the side of the ambushing unit, in order to protect its flank.
Had the ambush been revealed or detected, the enemy will try to outflank the ambushing force, which where these security comes in handy.
The Security also can provide movement report or act as an LP/OP if they are well hidden, report back enemy traffic and activities, and the command element can then readjust the ambush
Command Element
As with all other military action, Ambush comes with a command element, a commander and its subordinate would be in the Command Element and organise the ambush, they would be best to have an unobstructed view on the enemy progress and also an unobstructed view on your own troop.
Command Element decide when and where to attack, or how to conceal your own element. Command element also responsible for the overall layout of the ambush, intelligence gathering and egress route when everything go south.
Strategic Ambush.
When a large unit (Such as Company, Battalion, Brigade or even Division) used to ambush your enemy as a whole, that ambush plan is said to be a Strategic Ambush
The key for Strategic Ambush is concealment and speed. Both of which is needed to move a large force into an area unnoticed. A good intelligence and counter intelligence network, a good command and control structure also help carry out Strategic Ambushes
A large scale ambush would usually involve a diversion or deception to begin the opening gambit. The uses of smaller force to try and entice the entire unit to step into a larger unit. Or simply allowing a prepared unit to engage and destroy an advancing unit (such cases like what the German did to the Roman in the Battle of Teutoberg Forest ) Where it allow a prepared force to disrupt and ultimately destroy an incoming enemy formation.
Each strategic ambush have its own strategic value, usually goes with a current operational demand. A Strategic Ambush can be used to start or end a change of objective.
Reacting to an Ambush
There are only one way to break an ambush, and that is to punch thru it before it is too late, however, if chances allow a withdraw, it could also be a consideration.
For Close Ambushes, as the kill zone is too close to you, you will take more damage trying to retreat then trying to punch thru it. So, for a standing close quarter ambush, the forces that inside the kill zone will try to assault the ambush force on the anchor point and get behind them and roll the ambush over.
For a Far ambush, units in kill zone can try to withdraw from the area if the range allow you to call for air/ground support. Another way is to assault the flank of the Ambushing force and either blow thru or disengage from the ambush.
The key to break out from an ambush is to try and maintain unit cohesion and integrity, where the goal of an ambush is to destabilise your own formation and the ambushing force can engage and destroy you one by one as you ceased to be a cohesive unit, and is not in mutual support position to each other. They Key to counter an Ambush is to fight your way out concentrating your firepower at one single point
The 5 steps for reacting to Ambush is as follow
-Go Prone
-Face the incoming fire
-Communicate
-Coordinate
-Assault
Avoiding Ambushes
Sometimes, when you have to react to it, it would have already been too late, so it would be wise to prevent and avoid being ambush in the first place. There are a few factors a commander can notice with the incoming ambush.
-Intelligence
To predict an ambush, intelligence are quite important. Troop movement, civilian movement, previous engagement are all good indicator on how or where your enemy is going to ambush you. The more you know the more completed picture you will hold. And chances are you will see an ambush coming your way from far away.
-Mapping
There are only a few spot anywhere that is suitable for an ambush, to ambush you, they will need to find a clearing to set up a kill zone, a concealment to conceal their troop, a vantage point to know you are coming and also an exfil route to get out after they ambush you. If you look at a map and you think that is a good place to ambush someone, chances are they are already there to ambush you.
-Sign
Not a sign saying "Ambush here". If there are no traffic on a busy day, that is a sign of something not right, a good commander always know what's different than the atmospheric in the area, Something is not right then chances are something is going to come down. If things seems out of place, usually because it WAS out of place, and that is the sign you need to look out
-Things going your way.
Usually, an enemy will stop you from getting into your way, and if you know there are enemy present in the area and they are not actively trying to stop you, that also means something is wrong. In the army, we have an old saying, there are no such things as going your way in war, when stuff is going all your way in war, you are being ambushed.
Case Study
Battle of River Trebia - 218 BC
In the battle of River Trebia, the Cartage ambushed the Roman near the water plain close to the River Trebia.
The ambush, laid by Hannibal's brother Mago was considered one of the military classics. Mago led 1000 cavalry and 1000 infantry into the river and conceal their encampment under the cover of darkness.
What happened was, when Hannibal open up their flank and pushing in a gap between their first and second line, Roman general Longus think that is a tactical error by the part of Hannibal, and move in between the first and second line to try and roll up the first infantry line from behind.
However, this is actually a trap for Hannibal to trap and destroy the Roman army from all side, once the Roman infantry enter the gap, the Mago Ambush closes the door and attack and surround the Roman from all sides.
What followed is a massacre.
Battle of Long Tan - 1966 AD
Battle of Long Tan is an engagement in Vietnam War, during which, a company (D Coy) of 6 Royal Australian Regiment (6RAR) was ambush in the plantation in Long Tan, Phouc Tuy province.
D Coy, 6RAR, commanded by major Harry Smith, start the day with a company size combat patrol into the woods West of Long Tan Plantation, after SIGINT element detected Heavy Enemy movement in the area. D Coy, 6RAR move alone the ridges called "Nui Dat 2" where the Vietcong D445 Battalion located.
Upon drawing in the 11 Platoon, lead by Lieutenant Gordon Sharp, the lead element open fire on 11 Platoon. Cutting down a whole section of Australian Troop. Thinking it was a platoon size enemy force, little do the Australian know, they were the forward element of a whole Battalion, 1100 men.
At this point, Smith move 10 Platoon, were moved to support 11 Platoon from their left flank, hoping to be able to pull 11 platoon back into Company Defensive position. That is not successful however, as D445 element started to encircle the newly moved up platoon, fearing the same fate as 11 Platoon (Which was being pinned down) Smith halted 10 platoon and move them into a Defensive Position
Artillery was called to Support the front of 11 Platoon position as well as East of 10th Platoon, at this point, a regimental fire support was called. 18 guns pound the area at a rate of 6 rounds per minute. It help stabilising both 11 and 10 platoon. However, with 11 platoon depleting their ammunition, A break out from 11 platoon is put into primary mission.
Smith then send 12 platoon, which was kept as company reserve to move up and relief 11 platoon. 12 platoon reach up to 200-250 meter away form 11 platoon, unable to move forward. now 12, 11 and 10 platoon form a triangle facing all direction.
The ties changes when 11 Platoon, now reduced to a single section of men (from 30 to 12 men) ran out of ammunition, 11 Platoon request artillery to fire at their position, so they can retreat toward 12 platoon. Artillery drop 25 and give the men of 11 platoon a danger close (a fact that gunnery officer Lt Morrie Stanley disputed as Sgt Buick observed artillery came "very close" to their position
At this point, RAAF resupply D Coy, and couple with the fact that 11 platoon radioman was shot and kill, Sgt Buick, now in charge of the platoon, decided to withdraw. And they ran 150 meter into 12 platoon position, upon reaching 12 platoon. 11 platoon have only 13 men out, 5 wounded 8 able bodied
D company, now with only 10 and 12 platoon as a effective fighting force, form up in a crescent shape anchoring with the HQ platoon and face the enemy onslaught, at the same time B Coy, 6RAR and A Coy 6RAR both ordered to support D Coy position in Long Tan, With B Coy moving in from the west on foot, A Coy boarded APC and travel all the way around and enter and broke the encirclement from the south.
The supporting element reached D Coy at 1910, at this point B Coy's 25 men reached D Coy as D Coy shrink their perimeter in preparation for the final NVA/VC assault. After the reinforcement broke through D445 battalion decided to disengage and melted back into the jungle.
Uzbin Valley Ambush - 2008 AD
Uzbin Valley ambush involve element of 3 Taliban Units and French ISAF force with support from USAFSOF and ANA.
The Taliban consist of 3 unit, around 100 soldier each, ambush and motorize French Company on the mountain passes on Uzbin Valley, toward the summit at Sper Kunday. The advance unit of the French Force, call sign Carmin-2 was ambushed by the local element of about 50 insurgent fighters at 15:30 zulu
While at the village of Sper Kunday, the Taliban have surrounded the forward element of Carmin-2 whom made it there, The vehicle section of Carmin-2 started firing their Heavy Weapon to support the Ground troop of Carmin-2 which dismounted and entered the village.
After Action report suggested that the French troop requesting Air Support at 16:10, Approximately 40 minutes since the Ambush started, and the USAF send ahead 2 F-15 Strike Eagle to support the French Troop, now being trapped in the summit of the Uzbin Valley pass.
Close proximity prevent Air Support from carry out Close Air Support. Taliban force also setup a blocking force to prevent the ground element of the remaining French/US troop to support the ambushed Carmin-2 Element up in the mountain.
Reinforcement finally arrived to secure Sper Kunday by air at 18:15 roughly 3 hours into the ambush, by now, the ground element stuck at Sper Kunday are seriously out of Ammunition. The reinforcement then together with Carmin-2 pushes the remaining Taliban out of their position at Sper Kunday.
At 00;10, 9 hours from the beginning of the ambush, the area is secured by Carmin-2, Carmin-3 and Rouge 3, both of which were sent as an reinforcement.
@Friko_Prizm do you listen to hardcore history podcasts by Dan Carlin?
@Friko_Prizm do you listen to hardcore history podcasts by Dan Carlin?
Yes I do he's really entertaining.
He's probably the best pop historian currently active, though, I personally prefer John Green's approach as he brings up historiographic issues much more often.
Although he makes quite a lot of mistakes and let's his personal feelings get the better of him often
Yes I do he's really entertaining.
He's probably the best pop historian currently active, though, I personally prefer John Green's approach as he brings up historiographic issues much more often.
Although he makes quite a lot of mistakes and let's his personal feelings get the better of him often
I've been searching for a podcast channel with a bigger scope for at least year now. Each time I think I've found a credible channel, they turn all 'kangz' and I'm forced to unsub.
The only African people Dan Carlin mentions are the Carthaginians, Namibian, Egyptians and Nubians. The latter three he mentions in the King of kings series.

Ferrari
VIP
Actually the mistake he made was that he waited until the winter to attack which is the reason why he lost. The attack took place just as winter begun, and the they made massive gains before the snow took out the planes and the tanks. They captured as many as 800,000 Russians in the first week. The Russians were no match for Germany and it is even reported that Stalin had a nervous breakdown, but he capitalized on the fact that the Germans were not prepared to fight in Russian winter. Russia had way more men too. If he had attacked before thew inter, and had used all his divisions in Russia to head for Moscow, the war would've ended in months.Military history and tactics
Regarding operation Barbarossa, it was one of Hitlers biggest mistakes. If you read military history, taking Russia is one of the tough challenges, where Napoleon and others failed.
One of the critical mistakes made by Hitler in the Eastern Front was not freeing the 6th German army which was surrounded by Soviet forces. Germany lost 225000 men. Hitler was stubborn, instead of attempting to break them out he told to keep the axis forces in Stalingrad and which eventually got destroyed by the soviets.
- Status
- Not open for further replies.
Trending
-

-
White nationalists are some of the most low IQ individuals I've ever seen
- Started by Barkhadle1520
- Replies: 73
-
